Sometimes we have a wall, and the texture aren’t correctly adjusted. There is some solutions we could easily imagine to fix it but most of them are a waste of time.
Rebuild the wall? it mean redo the work you’ve done….
Manualy adjust the texture on each faces? it’s a mightmare and the result won’t be always efficiant. Trust me…
As usual, you can dowload the sample file
Sometimes it’s hard to understand with only one tutorial.
If you need another source, take a look at this link.
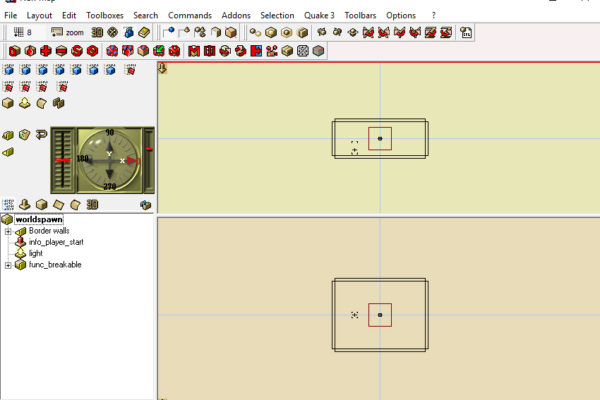
Whatever, consider this situation
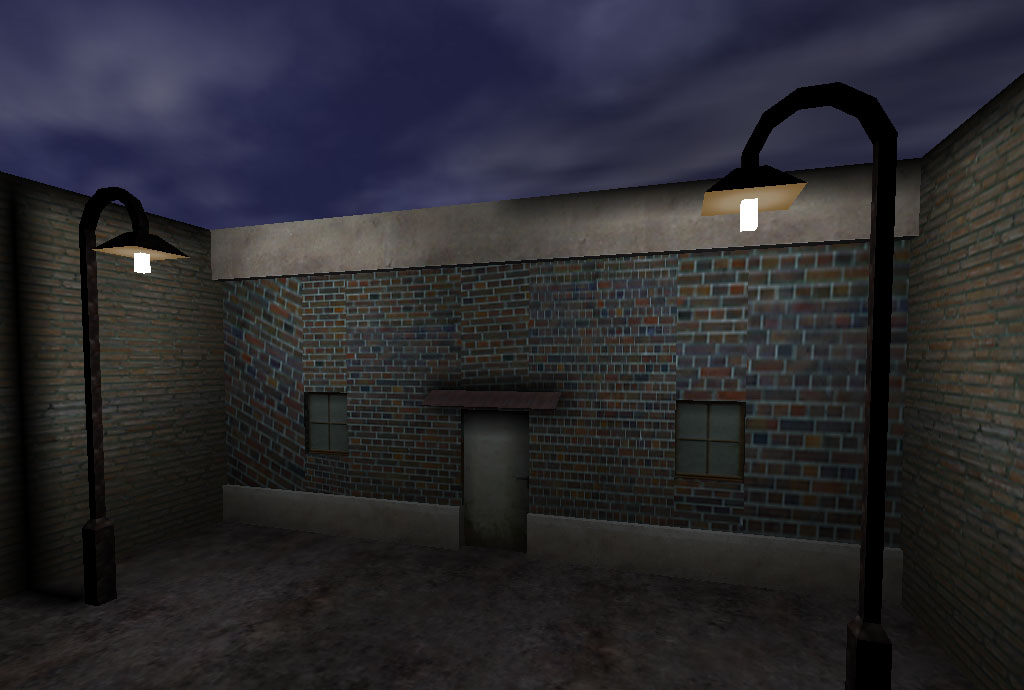
As you can see, textures are fucked up. Please look twice at this building and don’t try to think it could be a nice effect. it’s just bad.
Fortunatley we can do something; sharing the textures position along each brushes. It’s quick and easy to do.
How can i do that ?
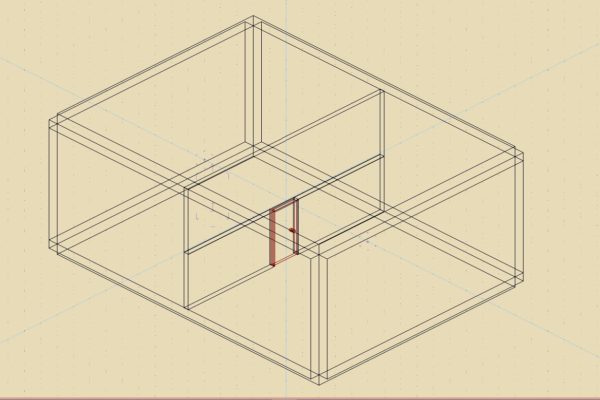
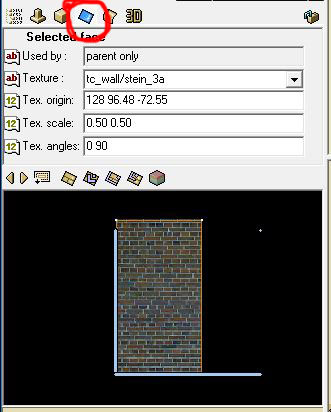
Let’s begin by selecting a face ( click on a a polygon and click on the blue square in the middle of a face to select the face )
and adjust it as we want by using the following tool. Here we give a 0.5 0.5 texture scale which is a good classical value.
If you need a littel more help about how dealing with texture, look at this tutorial. there is a few more informations.
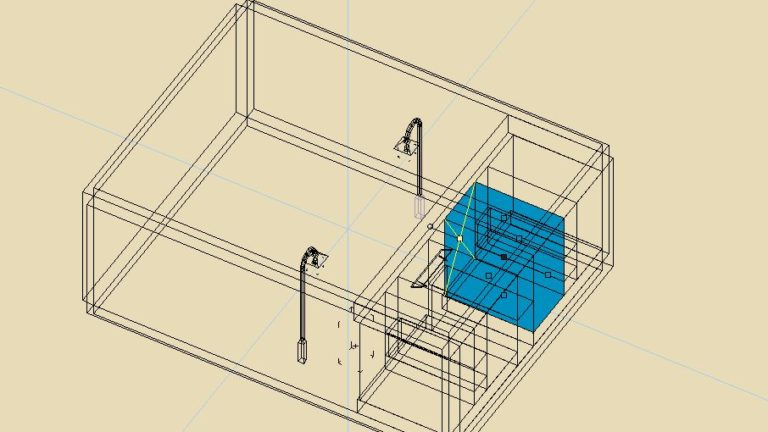
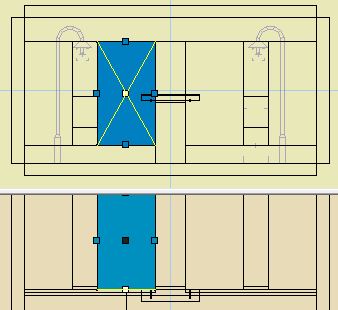
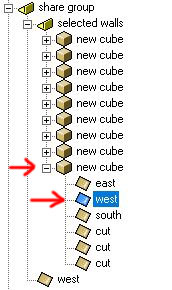
Now you have to group all the poly into a folder. This folder must contain only those polygons that will have a shared face. Once it’s done, put that folder into another folder. ( yes, i know it look strange )
Look at this picture.

Okay, my polygons are into a folder which is into a folder. Now what?
Now we are going to do something even stranger. We will select the face we scale previously and drag it to the parent folder. Look at this picture:
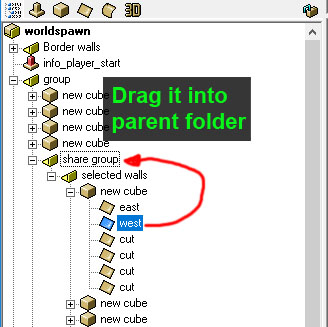
Okay…. Now what?
Now you will have to delete the face you to share for each polygon in the child folder.
Select it and do a right click on it and choose “Delete face” at the bottom of the contextual menu.
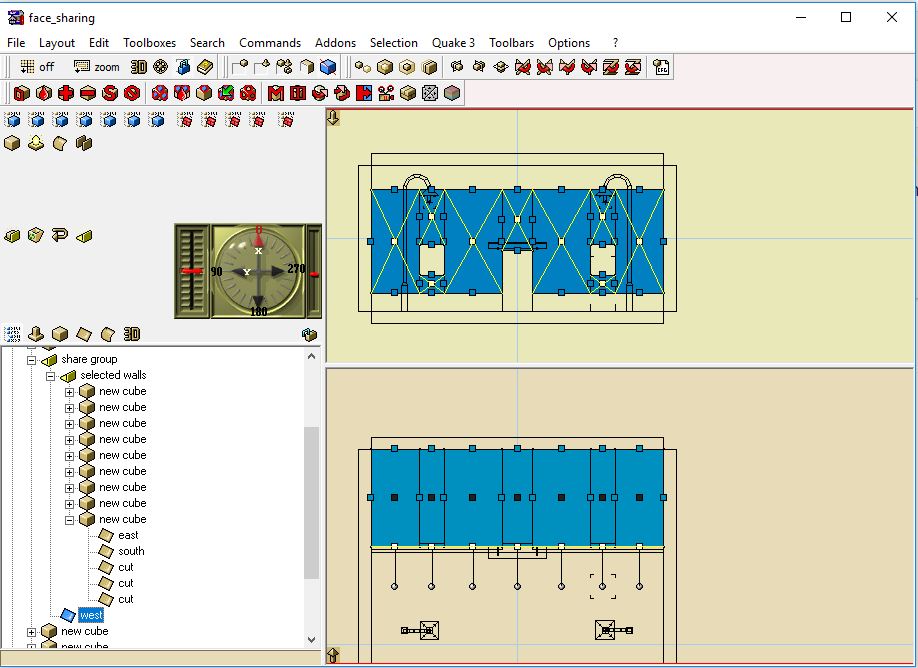
Do it again for each polygon into the child folder. In our case the child folder is called “selected walls”.
Once it’s done, you can select the face you previously move, and all the other faces you just delete are selected and inherit the property of the parent face. You shuold have something like that:
Pretty cool 🙂
You can now adjust the texture property for all the polygons as if there were one. ( the “face view icon shown on the third image on this tutorial )
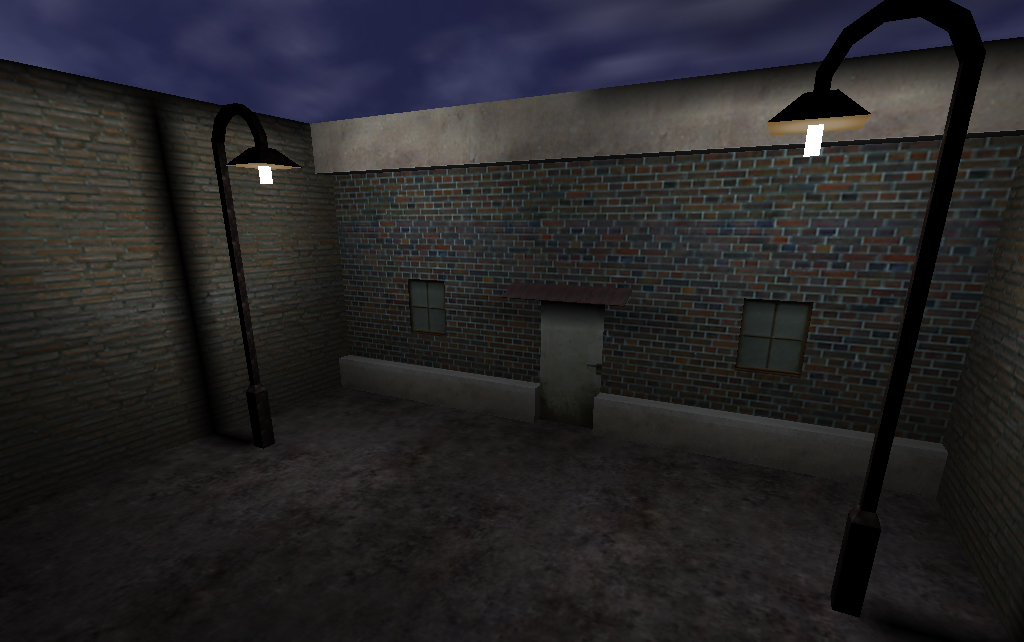
You should and with somthing like that; compere it with the first picture, you’ll see; it’s a lot better!
When you spend time time on a building and when walls are complex, use this method if textures mess up. you will gain a lot of time.